파이선을 이용해서 GoPro 타임랩스 이미지로 비디오 만들기
GoPro 카메라로 촬영한 타임랩스는 멋진 순간들을 연속적으로 담아내는 데 탁월합니다. GoPro 의 타입랩스 기능을 사용하면 정해진 간격으로 이미지를 생성합니다. 하지만, 이 많은 이미지들을 관리하고 비디오로 만드는 것은 쉬운 일이 아닙니다. 이 블로그에서는 Python 스크립트 두 개를 사용하여 GoPro 타임랩스 이미지들을 쉽게 정리하고, 이를 사용해 비디오를 만드는 과정을 안내합니다.

GoPro 타임랩스 이미지 정리하기
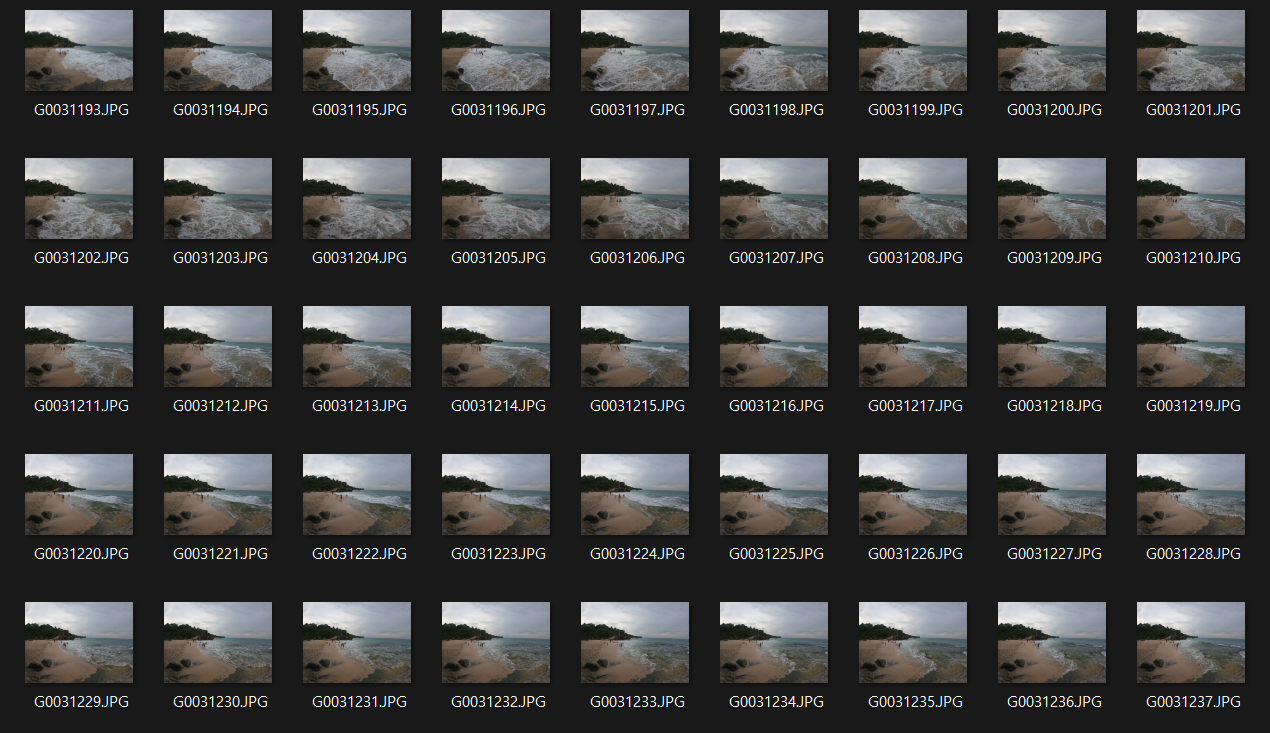
GoPro 의 타입랩스 기능을 사용하면 정해진 간격으로 이미지를 생성합니다. 예를 들면 Gopro 의 이미지를 가져오면 다음과 같습니다.
group_files.py 스크립트
group_files.py는 이미지 파일들을 수정 시간에 따라 그룹으로 분류하고, 각 그룹별로 디렉토리를 생성하여 파일들을 정리합니다. 또한, 파일의 정보(파일명, 수정 시간, 크기, 그룹 번호)를 CSV 파일로 저장하여 파일 관리를 용이하게 합니다.
- GoPro 카메라로 촬영한 JPG 타임랩스 이미지들을
timelaps라는 이름의 디렉토리에 저장합니다. - Python 환경에서
group_files.py스크립트를 실행합니다. python group_files.py- 스크립트가 실행되면,
timelaps디렉토리 내부에 각 그룹별로 서브디렉토리가 생성되고, 이미지 파일들이 이동됩니다. file_info.csv파일에는 각 파일의 상세 정보가 저장됩니다.
timelaps 이미지의 시간 간격이 3초 이상일때 서브디렉토리를 생성하고 해당 디렉토리에 복사하였습니다. 아래 코드를 첨부 합니다.
import os
import datetime
import csv
import shutil

def get_file_info(filepath):
    """
    Retrieve information about a file.
    Args:
        filepath (str): Path to the file.

    Returns:
        dict: Information about the file including filename, modification time, and size.
    """
    stats = os.stat(filepath)
    return {
        "filename": os.path.basename(filepath),
        "modification_time": datetime.datetime.fromtimestamp(stats.st_mtime).strftime('%Y-%m-%d %H:%M:%S'),
        "size": stats.st_size
    }

def save_to_csv(data, filename="file_info.csv"):
    """
    Save collected data to a CSV file.
    Args:
        data (list): List of dictionaries containing file information.
        filename (str): Name of the CSV file to save the data.
    """
    with open(filename, 'w', newline='', encoding='utf-8') as csvfile:
        fieldnames = ['filename', 'modification_time', 'size', 'group']
        writer = csv.DictWriter(csvfile, fieldnames=fieldnames)

        writer.writeheader()
        for entry in data:
            writer.writerow(entry)

def main():
    directory = 'timelaps'
    file_infos = []
    current_group = 1
    last_mod_time = None

    # Process all JPG files in the directory
    for file in sorted(os.listdir(directory)):
        if file.lower().endswith('.jpg'):
            filepath = os.path.join(directory, file)
            info = get_file_info(filepath)

            # Assign a group number based on modification time
            if last_mod_time is not None:
                current_mod_time = datetime.datetime.strptime(info['modification_time'], '%Y-%m-%d %H:%M:%S')
                if (current_mod_time - last_mod_time).total_seconds() > 3:
                    current_group += 1
            info['group'] = current_group
            last_mod_time = datetime.datetime.strptime(info['modification_time'], '%Y-%m-%d %H:%M:%S')

            # Create a directory for the group and copy the file into it
            group_directory = os.path.join(directory, f"group_{current_group}")
            if not os.path.exists(group_directory):
                os.makedirs(group_directory)
            shutil.copy2(filepath, group_directory)

            file_infos.append(info)

    # Save the file information to a CSV file
    save_to_csv(file_infos)
    print("File information has been saved to file_info.csv")

if __name__ == "__main__":
    main()
이 Python 스크립트는 'timelaps' 폴더 안에 있는 JPG 이미지 파일들의 정보를 분석하고, 이를 그룹화하며, 그 결과를 CSV 파일로 저장하는 기능을 합니다.
필요 모듈
os: 파일 관리 및 디렉토리 작업을 위한 기능, datetime: 날짜와 시간 조작을 위한 도구, csv: CSV 파일 읽기 및 쓰기 기능, shutil: 고수준 파일 및 디렉토리 작업을 위한 유틸리티 제공.
get_file_info 함수
파일의 경로를 받아 파일의 이름, 수정된 시간, 파일 크기 등의 정보를 딕셔너리 형태로 반환하는 함수로, 파일 관련 데이터 수집에 사용됩니다.
save_to_csv 함수
수집된 파일 정보를 포함하는 리스트를 받아, 이를 CSV 파일 형식으로 저장하며, 파일 이름, 수정 시간, 파일 크기, 그룹 번호 등이 기록됩니다.
main 함수
'timelaps' 디렉토리의 JPG 파일들을 처리하고, get_file_info 함수를 사용해 파일 정보를 수집한 후, 파일들을 수정 시간에 따라 그룹화하고 각 그룹별로 디렉토리를 생성하여 파일을 분류하며, 마지막으로 save_to_csv 함수를 사용하여 이 정보를 CSV 파일로 저장하는 주요 실행 로직을 포함하고 있습니다.
결론
이 스크립트를 실행하면 'timelaps' 디렉토리의 JPG 파일들을 분석하여, 수정 시간을 기준으로 그룹화하고, 각 그룹별로 디렉토리를 만들어 파일을 분류한 후, 이 정보를 CSV 파일로 저장합니다.
GoPro 타임랩스 비디오 만들기
GoPro 타임랩스 비디오 만들기 위해 encode.py 스크립트는 정리된 이미지들을 가지고 하나의 연속된 비디오를 만듭니다. 이 스크립트는 이미지들을 1920픽셀 너비로 리사이즈하고, 이를 사용해 동영상 파일을 생성합니다.
필요한 준비물
Python 3.X 환경에서 OpenCV-Python 라이브러리 (opencv-python)를 설치하기 위해 pip install opencv-python 명령어 사용
사용 방법
명령행에서 encode.py 스크립트를 실행합니다. 이 때, 이미지 폴더, 출력할 비디오 파일명, 그리고 초당 프레임 수를 지정해야 합니다.
$ python3 encode.py [image_folder] [video_name] [fps]예를 들어, grouped_timelaps 폴더 안의 이미지들로 output_video.mp4라는 비디오를 30 FPS로 만들고 싶다면 다음과 같이 입력합니다.
python encode.py grouped_timelaps output_video.mp4 30아래 전체 코드를 참고하세요. 이 Python 스크립트는 JPEG 이미지 파일들을 사용하여 비디오를 생성하는 작업을 수행합니다.
import cv2
import os
import argparse

def resize_image(image, target_width):
    """
    Resize an image to a specified width while maintaining its aspect ratio.

    Args:
    image (numpy.ndarray): The image to be resized.
    target_width (int): The desired width of the image.

    Returns:
    numpy.ndarray: The resized image.
    """
    # Calculate the target height to maintain the aspect ratio
    target_height = int(image.shape[0] * (target_width / image.shape[1]))
    # Resize and return the image
    return cv2.resize(image, (target_width, target_height), interpolation=cv2.INTER_AREA)

def encode_images_to_video(image_folder, video_name, fps, width=1920):
    """
    Encode images from a folder into a video.

    Args:
    image_folder (str): The folder containing JPEG images.
    video_name (str): The name of the output video file.
    fps (int): Frames per second of the output video.
    width (int): The width to which images will be resized.
    """
    # Retrieve image file names and sort them
    images = sorted(img for img in os.listdir(image_folder) if img.lower().endswith((".jpg", ".jpeg")))

    if not images:
        print(f"No JPG or JPEG files found in folder {image_folder}.")
        return

    # Read and resize the first image to determine video dimensions
    first_image_path = os.path.join(image_folder, images[0])
    first_image = cv2.imread(first_image_path)
    resized_first_image = resize_image(first_image, width)
    video_height, _, _ = resized_first_image.shape

    # Initialize the video writer
    video = cv2.VideoWriter(video_name, cv2.VideoWriter_fourcc(*'mp4v'), fps, (width, video_height))

    # Process each image, resize it, and write to the video
    for image in images:
        img_path = os.path.join(image_folder, image)
        img = cv2.imread(img_path)
        resized_img = resize_image(img, width)
        video.write(resized_img)

    # Release resources
    cv2.destroyAllWindows()
    video.release()

def main():
    # Set up command line arguments
    parser = argparse.ArgumentParser(description='Encode JPEG images into a video.')
    parser.add_argument('image_folder', type=str, help='Folder containing JPEG images')
    parser.add_argument('video_name', type=str, help='Name of the output video file')
    parser.add_argument('fps', type=int, help='Frames per second for the video')

    args = parser.parse_args()

    # Check if the image folder exists
    if not os.path.exists(args.image_folder):
        print(f"The folder {args.image_folder} does not exist.")
        return

    # Encode images to video
    encode_images_to_video(args.image_folder, args.video_name, args.fps)

if __name__ == "__main__":
    main()
이 Python 스크립트는 JPEG 이미지 파일들을 사용하여 비디오를 생성하는 작업을 수행합니다.
모듈 임포트
cv2: OpenCV 라이브러리를 사용하여 이미지 및 비디오 처리 작업을 수행합니다.os: 파일 시스템 관련 작업을 위해 사용합니다.argparse: 커맨드 라인 인자를 파싱하기 위해 사용합니다.
resize_image 함수
- 이미지를 지정된 너비에 맞춰 크기를 조정하면서 종횡비(aspect ratio)를 유지합니다.
- 인자로 넘파이 배열 형태의 이미지와 목표 너비를 받습니다.
- 조정된 이미지를 넘파이 배열로 반환합니다.
encode_images_to_video 함수
- 지정된 폴더에 있는 JPEG 이미지들을 비디오로 인코딩합니다.
- 이미지 폴더, 출력 비디오 파일 이름, 비디오의 FPS(초당 프레임 수), 이미지의 너비를 인자로 받습니다.
- 폴더 내의 이미지 파일을 찾아 정렬한 후, 첫 번째 이미지를 기준으로 비디오의 해상도를 결정합니다.
- OpenCV의
VideoWriter를 사용하여 비디오 파일을 생성합니다. - 각 이미지를 순회하면서 크기를 조정하고, 비디오에 쓰기 작업을 수행합니다.
- 모든 작업이 끝나면 자원을 해제합니다.
main 함수
argparse를 사용하여 커맨드 라인 인자를 받습니다. 이 인자에는 이미지 폴더 경로, 출력 비디오 파일 이름, 비디오의 FPS가 포함됩니다.- 입력받은 이미지 폴더가 실제로 존재하는지 확인합니다.
encode_images_to_video함수를 호출하여 이미지들을 비디오로 인코딩합니다.
if __name__ == "__main__": 조건 아래 main 함수가 있어, 이 스크립트를 직접 실행할 경우 main 함수가 실행됩니다. 이 스크립트는 사용자가 지정한 폴더의 JPEG 이미지들을 가져와서, 이를 사용하여 비디오 파일을 생성합니다. 사용자는 커맨드 라인을 통해 이미지 폴더의 경로, 생성할 비디오 파일의 이름, 그리고 비디오의 FPS를 지정할 수 있습니다.
결론
이 두 Python 스크립트를 사용하면 GoPro 타임랩스 이미지들을 쉽게 관리하고, 이를 활용해 멋진 비디오를 만들 수 있습니다.
'프로그래밍 > Python' 카테고리의 다른 글
| 파이선 pycairo 에서 context 읽지 못하는 오류 (0) | 2023.03.05 |
|---|---|
| Ubuntu 20.04 미니콘다 설치 (0) | 2023.01.27 |
| Python 디스크 사용량 출력하기 (2) | 2019.10.13 |


