OPENCV 스테레오 카메라 StereoBM 예제

OpenCV 를 이용한 스테레오 이미지의 StereoBM 예제
테스트환경
테스트를 위한 Host PC 에는 우분투 Ubuntu 18.04 와 OpenCV 4.2.0 가 설치되어 있다. OpenCV 4.2.0 설치는 아래 포스팅을 참고한다.
2022.06.10 - [프로그래밍/OpenCV] - [OPENCV] Ubuntu 18.04 OpenCV 4.2.0 설치하기
[OPENCV] Ubuntu 18.04 OpenCV 4.2.0 설치하기
Ubuntu 18.04 OpenCV 4.2.0 설치하기 OpenCV (Open Source Computer Vision)은 컴퓨터비전 개발을 위한 오픈소스 라이브러리이다. 초기에는 인텔이 개발하였기 때문에, CPU에서 가속되는 IPP(Intel Performa..
makepluscode.tistory.com
OpenCV CMake 작성
다음과 같이 CMakeLists.txt 를 작성한다.
cmake_minimum_required(VERSION 3.0)

project(streobm)

find_package(OpenCV REQUIRED)

set(
    CMAKE_RUNTIME_OUTPUT_DIRECTORY
    ${CMAKE_HOME_DIRECTORY}
)

add_executable(
    ${PROJECT_NAME}
    src/main.cpp
)

target_include_directories(
    ${PROJECT_NAME}
 PRIVATE
    ${OpenCV_INCLUDE_DIRS}
)

target_link_libraries(
    ${PROJECT_NAME}
    ${OpenCV_LIBRARIES}
)
OpenCV 예제 코드 작성
다음과 같이 코드를 작성한다.
#include "opencv2/core/core.hpp"
#include "opencv2/calib3d/calib3d.hpp"
#include <opencv2/highgui/highgui.hpp>
#include <opencv2/imgproc/imgproc.hpp>

#include <iostream>

using namespace cv;
using namespace std;

int main()
{
    cout << "opencv version : " << CV_VERSION << endl;

    // read 2 images (as 8UC1)
    Mat imgl, imgr;
    imgl = imread("./img/capture0.jpg", IMREAD_GRAYSCALE );
    imgr = imread("./img/capture1.jpg", IMREAD_GRAYSCALE );

    // resize 2 images to small (540x270)
    Mat img1, img2;
    resize(imgl, img1, Size(960,540));
    resize(imgr, img2, Size(960,540));

    // StereoBM
    int ndisparities = 16;
    int blocksize = 21;

    // create stereo image
    Mat img_disparity_16s, img_disparity_8u;

    cv::Ptr<cv::StereoBM> stereo = cv::StereoBM::create(ndisparities, blocksize);
    stereo->compute(img1, img2, img_disparity_16s);

    // normalize img_disparity_16s
    double minVal; double maxVal;
    minMaxLoc( img_disparity_16s, &minVal, &maxVal );
    cout << "min : " << minVal << ", max : " << maxVal << endl;
    img_disparity_16s.convertTo(img_disparity_8u, CV_8UC1, 255/(maxVal - minVal));

    imshow("left", img1);
    imshow("right", img2);
    imshow("disparity", img_disparity_8u);

    waitKey(0);

    return 0;
}
위 예제 코드의 간단한 설명은 다음과 같다.
- imread 를 통해 이미지 파일 2개를 GRAYSCALE 형식으로 읽어온다.
- resize 를 이용하여 960x540 해상도 이미지로 변경한다.
- StereoBM create API 를 사용하여 StereoBM 객체를 ndisparities 16, blocksize 21 로 생성한다. (아래 파라미터 설명 참고)
- compute 함수를 사용하여 disparity map 이미지를 만든다.
- disparity map 이미지를 출력하기 위해 0~255 값으로 정규화 normalize 한다.
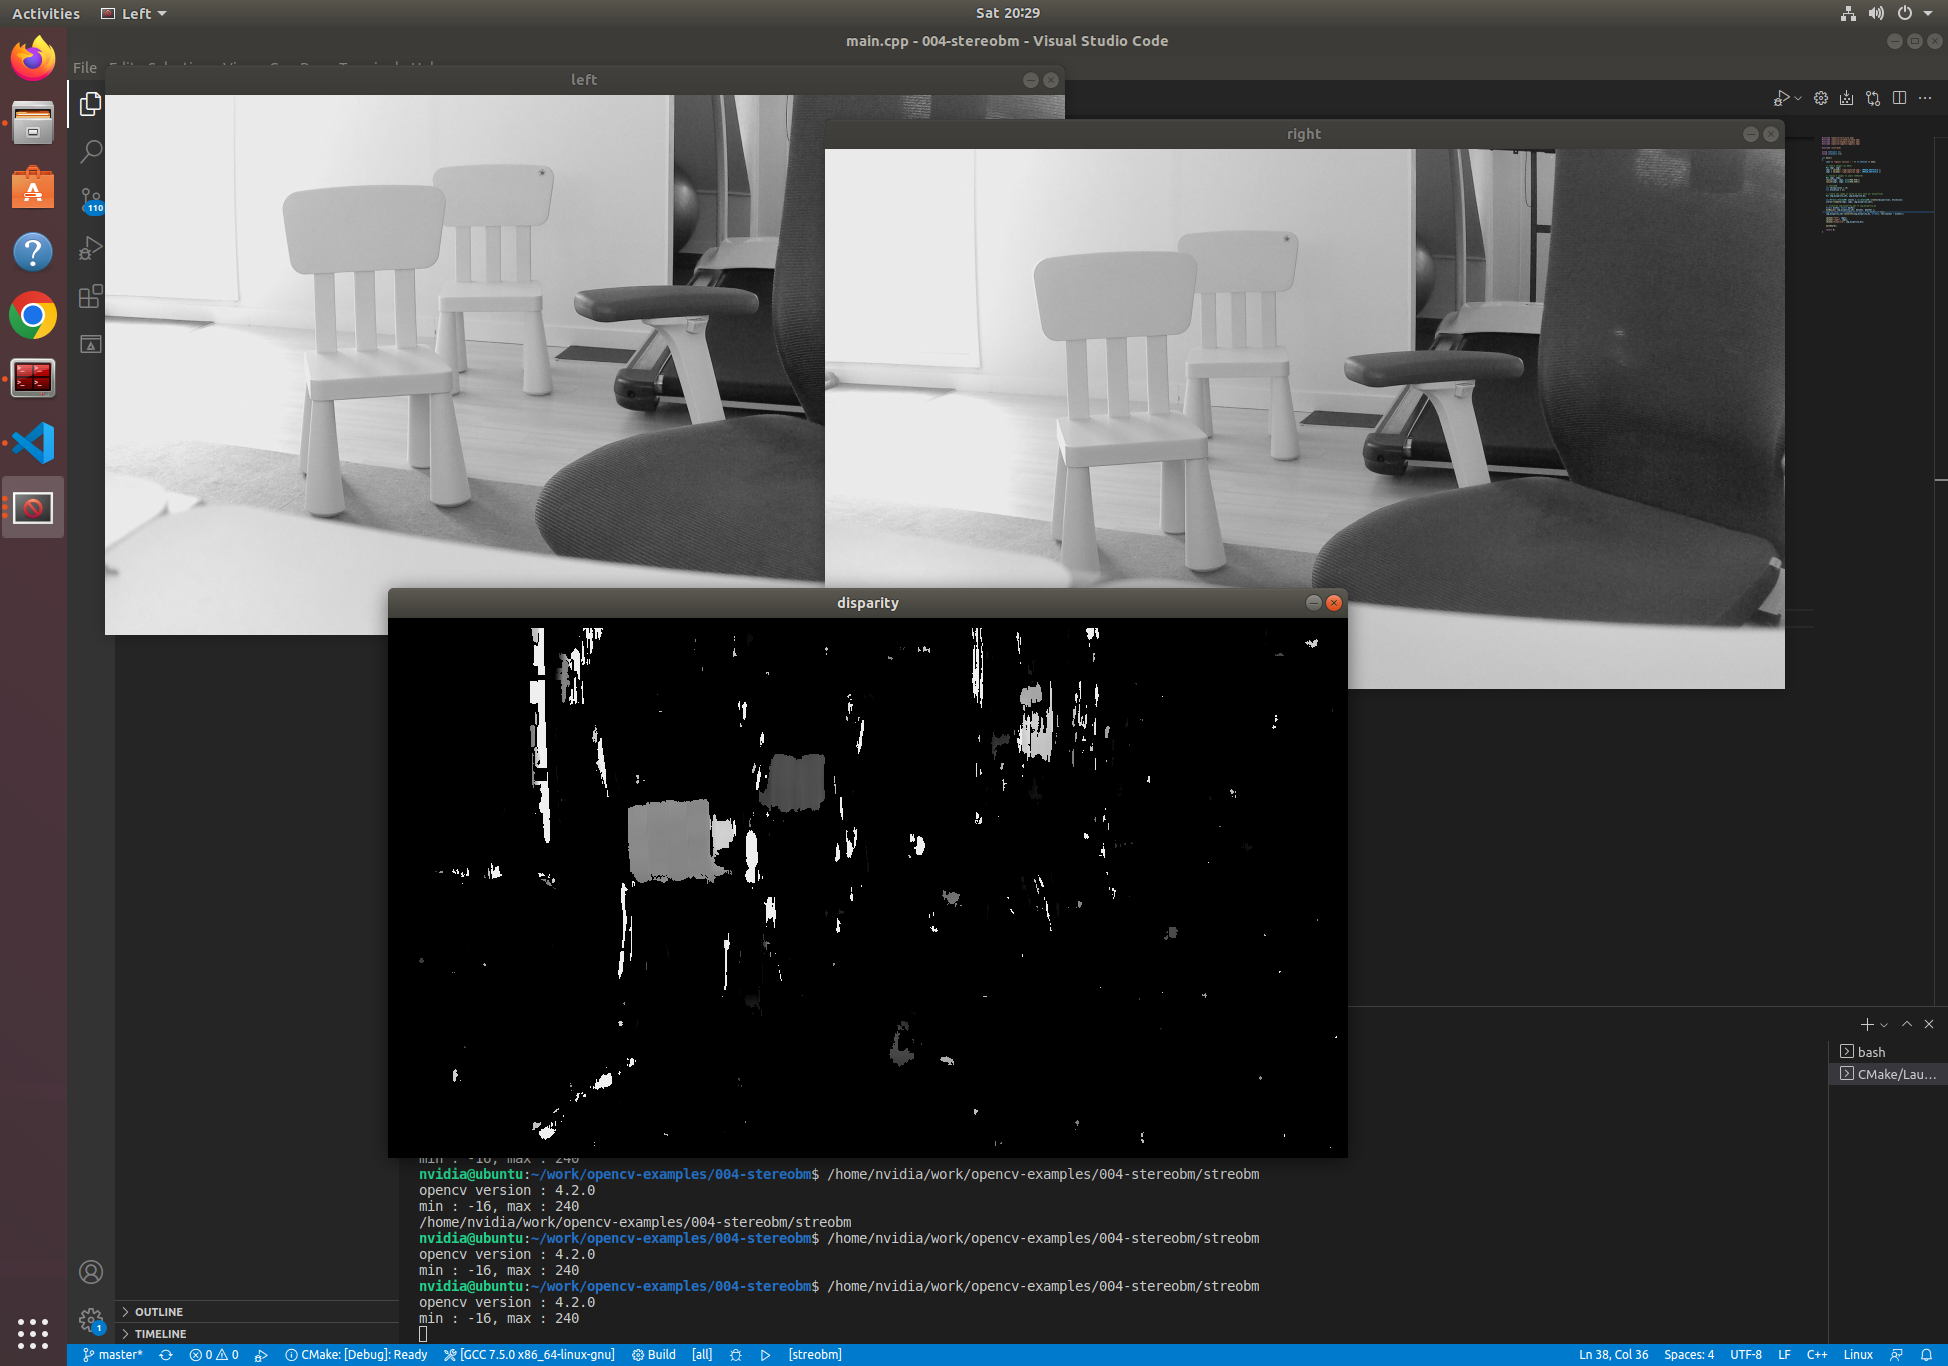
- 이미지 파일 2개와 normalized 결과를 출력한다.
| 파라미터 | 설명 |
| numDisparities | the disparity search range. For each pixel algorithm will find the best disparity from 0 (default minimum disparity) to numDisparities. The search range can then be shifted by changing the minimum disparity. |
| blockSize | the linear size of the blocks compared by the algorithm. The size should be odd (as the block is centered at the current pixel). Larger block size implies smoother, though less accurate disparity map. Smaller block size gives more detailed disparity map, but there is higher chance for algorithm to find a wrong correspondence. |
실행결과
disparities 16, blocksize 11 의 출력 결과

disparities 16, blocksize 21 의 출력 결과

실행결과 분석
두 개의 스테레오 이미지에서 disparity map 이미지를 얻었지만 결과가 좋지 못하다. 다른 파라미터가 튜닝 되어야 하거나, 카메라 캘리브레이션이 선행되어야 할 것 같다. 다음 포스팅에서 카메라 캘리브레이션을 다룰 예정이다.
참고자료
전체 코드는 makepluscode github 를 참고한다.
https://github.com/makepluscode/opencv-examples/tree/master/004-stereobm-ex1
GitHub - makepluscode/opencv-examples
Contribute to makepluscode/opencv-examples development by creating an account on GitHub.
github.com
OpenCV StereoBM 의 메뉴얼을 참고한다.
https://docs.opencv.org/3.4/d9/dba/classcv_1_1StereoBM.html
OpenCV: cv::StereoBM Class Reference
Class for computing stereo correspondence using the block matching algorithm, introduced and contributed to OpenCV by K. Konolige. More... Class for computing stereo correspondence using the block matching algorithm, introduced and contributed to OpenCV by
docs.opencv.org
'프로그래밍 > OpenCV' 카테고리의 다른 글
| [OPENCV] 카메라 캘리브레이션 (0) | 2022.06.16 |
|---|---|
| [OPENCV] SGBM vs StereoBM 깊이맵 결과 비교 (1) | 2022.06.15 |
| [OPENCV] 스테레오 깊이맵 성능 높이기 (0) | 2022.06.15 |
| [OPENCV] GSTREAMER 를 이용한 이미지 캡처 (0) | 2022.06.13 |
| [OPENCV] Ubuntu 18.04 OpenCV 4.2.0 설치하기 (0) | 2022.06.10 |
| [OPENCV] MAT 클래스 type 이해하기 (0) | 2022.06.10 |
| [OPENCV] 여러개 이미지 합성 + 합치기 C++ 예제 (0) | 2022.06.09 |
| [OPENCV] Ubuntu 20.04 OpenCV 4.0.0 설치하기 (0) | 2022.04.03 |


