Python 으로 mp4 filesrc 예제 구현하기
Gstreamer 응용프로그램을 개발할때 Python 언어를 사용할 수 있도록 PYTHON 바인딩을 제공한다. 많이 사용하는 기능인 mp4 file 을 읽어서 pipeline 을 구성하는 예제를 구현하는 코드를 정리한다.

gstreamer factory 파이프라인 예제
테스트 환경
- Gstreamer 1.16.4
- Python 3.8.10
gstreamer filesrc 구현하기
Gstreamer 의 ElementFactory 는 programming 을 통해 Gstreamer 플러그인을 load 하는 함수 이다. 아래의 코드는 filesrc, qtdemux, avdec_h264, h264parse, videoconvert, autovideosink 를 load 하고 하나의 pipeline 으로 연결시키는 예제이다.
- filesrc 는 로컬 파일 시스템의 파일 읽는다. location 이라는 속성으로 파일의 위치를 지정한다.
- qtdemux 는 멀티미디어 콘텐츠 파일을 video 와 audio 스트림으로 demuxing 한다. 동적 pad 속성으로 아래 예제코드와 같이 demuxer_pad_added 를 통해서 video 항목만 link 해야 한다.
- avdec_h264 는 libav 에 구현된 h264 decoder 이다.
- h264parse 는 H.264 스트림을 파싱하는 플러그인이다.
- autovideosink는 적합한 비디오 싱크를 자동으로 감지하여 화면에 영상을 렌더링 해준다.
def create_pipepline(pipeline: Gst.Pipeline):
    src = Gst.ElementFactory.make("filesrc", "src")
    src.set_property("location", "../video/road.mp4")

    demux = Gst.ElementFactory.make("qtdemux", "demux")
    parse = Gst.ElementFactory.make("h264parse", "parse")
    decode = Gst.ElementFactory.make("avdec_h264", "decode")
    convert = Gst.ElementFactory.make("videoconvert", "convert")
    sink = Gst.ElementFactory.make("autovideosink", "sink")

    if (not src or not demux or not parse or not decode or not convert or not sink):
        print("ERROR: Not all elements could be created.")
        sys.exit(1)

    pipeline.add(src)
    pipeline.add(demux)
    pipeline.add(parse)
    pipeline.add(decode)
    pipeline.add(convert)
    pipeline.add(sink)

    ret = src.link(demux)

    def demuxer_pad_added(demuxer, pad, parse):
        if pad.name == 'video_0':
            demuxer.link(parse)

    demux.connect("pad-added", demuxer_pad_added, parse)

    ret = ret and parse.link(decode)
    ret = ret and decode.link(convert)
    ret = ret and convert.link(sink)

    if not ret:
        print("ERROR: Elements could not be linked")
        sys.exit(1)
    else:
        print("DONE: Elements could be linked")

    return True
main 함수에서는 생성된 pipeline 을 PLAYING 상태로 바꾸고, loop 를 실행한다.
pipeline.set_state(Gst.State.PLAYING)
loop = GLib.MainLoop()
...

loop.run()
pipeline loop 에서 이벤트를 받고 처리하기 위해서 bus 객체를 이용한다. gstreamer pipeline 에 기본적으로 내장된 bus 는 callback 이벤트를 통해서 프로그래머에게 변화를 알려준다.
def on_message(bus: Gst.Bus, message: Gst.Message, loop: GLib.MainLoop):
    msg = message.type

    if msg == Gst.MessageType.EOS:
        print("on_message : End Of Stream")
        loop.quit()

    elif msg == Gst.MessageType.WARNING:
        err, debug = message.parse_warning()
        print("on_message : Warnning -", err, debug)

    elif msg == Gst.MessageType.ERROR:
        err, debug = message.parse_error()
        print("on_message : Error -", err, debug)
        loop.quit()

    return True

...

# connect bus to catch signal from the pipeline
bus = pipeline.get_bus()
bus.add_signal_watch()
bus.connect("message", on_message, loop)- EOS (End of Stream) : stream 의 끝을 EOS 메시지로 알려준다.
- WARNING, ERROR : Warning 과 Error 메시지는 처리해야 하는 경고나 오류를 알린다.
bus callback 함수를 통해 pipeline 수행 과정에서 발생하는 이벤트를 받고, 이를 처리할 수 있다.
예제 실행하기
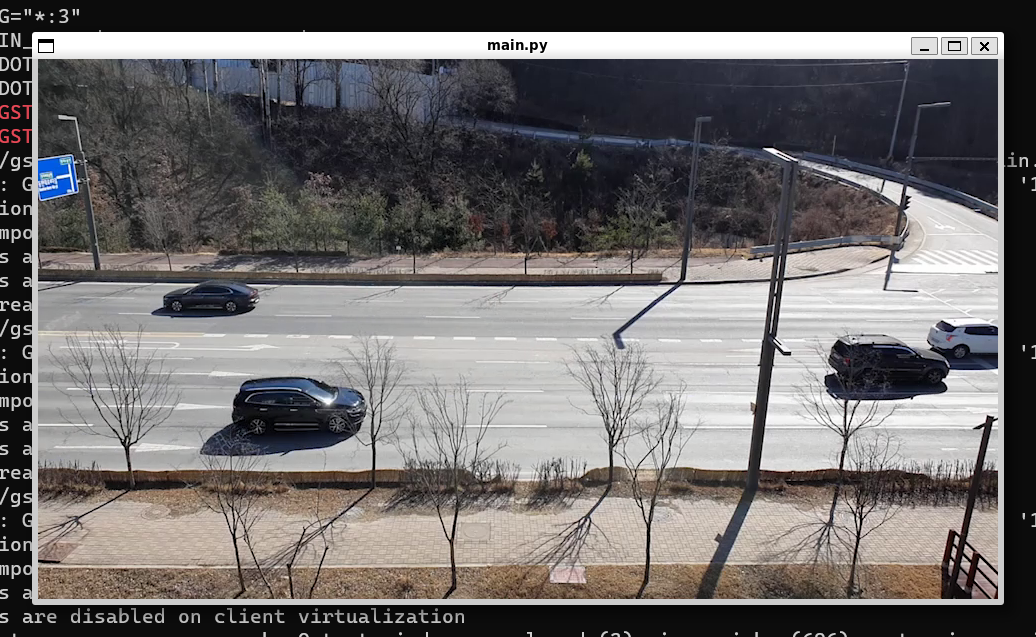
python3 를 통해서 구현된 코드를 실행하자. 아래와 같이 mp4 소스가 화면에 렌더링 되는 것을 확인할 수 있다.

전체코드
예제의 python 전체코드는 makepluscode 의 github 를 참고한다.
https://github.com/makepluscode/gstreamer-examples-python/blob/master/03-filesrc/main.py
GitHub - makepluscode/gstreamer-examples-python: Gstreamer examples written by in Python
Gstreamer examples written by in Python. Contribute to makepluscode/gstreamer-examples-python development by creating an account on GitHub.
github.com
참고자료
gst-reamer 파이선 바인딩 관련 소스는 아래 gitlab 을 참고한다.
https://gitlab.freedesktop.org/gstreamer/gst-python
GStreamer / gst-python · GitLab
GStreamer Python binding overrides Please submit new issues and merge requests against the GStreamer mono repo!
gitlab.freedesktop.org
makepluscode 의 launch 를 통한 python gst-reamer 파이프라인 실행 예제
2023.02.02 - [프로그래밍/GLibㆍGTKㆍGstreamer] - Gstreamer Python : pipeline 예제
Gstreamer Python : pipeline 예제
Python 으로 Gstreamer pipeline 구현 예제 Gstreamer 프레임워크는 기본적으로는 C 언어로 프로그래밍 가능하다. 추가로 Python 언어를 사용할 수 있도록 GST-PYTHON 바인딩을 제공한다. 몇개의 예제를 통하여
makepluscode 의 factory 파이프라인 구현하는 예제
2023.02.02 - [프로그래밍/GLibㆍGTKㆍGstreamer] - Gstreamer Python : factory 파이프라인 구현하기
Gstreamer Python : factory 파이프라인 구현하기
Python 으로 구현한 gstreamer factory 파이프라인 예제 Gstreamer 프레임워크에서 응용프로그램 개발 시, Python 언어를 사용할 수 있도록 Gstreamer -PYTHON binding 을 제공한다. plug-in 을 로드해서 파이프라인을
makepluscode.tistory.com
'프로그래밍 > GLibㆍGTKㆍGstreamer' 카테고리의 다른 글
| Gstreamer Python : Appsink 구현하기 (0) | 2023.02.02 |
|---|---|
| Gstreamer Python : videorate FPS 변경 하기 (0) | 2023.02.02 |
| Gstreamer Python : factory 파이프라인 구현하기 (1) | 2023.02.02 |
| Gstreamer Python : pipeline 예제 (0) | 2023.02.02 |
| 윈도우 GNU, MSYS2 개발환경 구축 (1) | 2022.12.03 |
| gtk 프로그래밍 ini 설정파일 파싱 예제 (0) | 2022.11.12 |
| Gstreamer 로 Jetson 에서 라즈베리파이v2 카메라 테스트 (0) | 2022.07.01 |
| GSTShark 로 Gst-reamer pipeline 프로파일링 (0) | 2022.05.30 |


